Page created on 14/09/2025.
Observation
I purchased this cross table back in 2012 to mount it on the 20000 milling support, in combination with the BFW 40/E motor and the Primus 75 vice. It is remarkable to note that prices have hardly changed since then.
This combination allows for light milling, even in steel, provided that shallow passes are made. However, I quickly noticed a flaw: the play in the trapezoidal screws can reach 1/4 or even 1/2 mm, which makes it virtually impossible to machine in both directions of travel. This is acceptable for drilling, but much less so for milling if you want to respect the direction of the cutter, for example when trimming.
I therefore sought to minimise these plays, and I use the plural because they have two origins:
- the connection between the chassis and the worm screw;
- the connection between the table drive nut and the same screw.
Note: the worm screws are trapezoidal, ⌀ 10 × pitch 2 mm.
Play between chassis and worm screw
The worm screw is only connected in translation by a smooth ring secured by a grub screw. This device leaves only two options: either sufficient play to prevent the crank from rotating unevenly, or tightening that makes manoeuvring almost impossible.
I believe that the best solution is to combine stops with corrugated spring washers. I have implemented the ball stops, and, having no corrugated washers, I replace them with No. 11 rubber plumbing seals. Two ball stops are required per axle.
Implementation is not so simple: the outer ball stop, towards the crank, causes it to spread apart, which poses two problems: the vernier may come out of its support, and the resulting space is an open door for the introduction of chips. The stop must therefore be “buried” in the hub of the crank by making a 5 mm deep countersink, which means separating the screw from the crank. To do this, the pin connecting them must be removed. To put the pin back in place during reassembly, the screw/crank assembly must be re-drilled to ⌀ 3, with a 5 mm offset towards the end.
Remarks:
- The vernier is held in place by friction using a spring and ball system. When I first took it apart, I did not notice this, and I was lucky to find these parts again! The second time (in September 2025), I forgot this observation and lost these parts for good. I replaced them with a layer of adhesive tape, which increases the friction of the vernier sufficiently.
- What looks like a slotted screw head at the end of the worm screw is actually just a simple slot in the worm screw itself. This is useful for speeding up the movement with an electric screwdriver.
Here are all the parts used.
- Crank handle.
- Hole for pin passage.
- External ball stop.
- Vernier.
- Shell-shaped support.
- Internal ball stop.
- Rubber seal.
- Translation locking ring.
Play between worm screw and drive nut
I first tried an unorthodox solution consisting of sawing the nut three-quarters of the way perpendicular to the worm screw axis and inserting one or two screws to spread the two parts apart and adjust the tightness. Obviously, this led to accelerated wear, as the tightness was not constant throughout the entire stroke. In addition, it was very difficult to access the adjustment screws to correct the play.
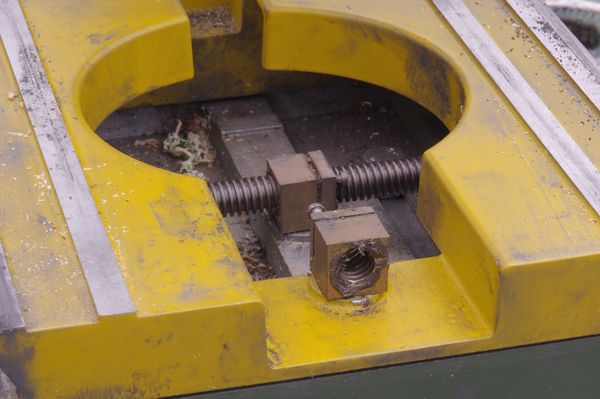
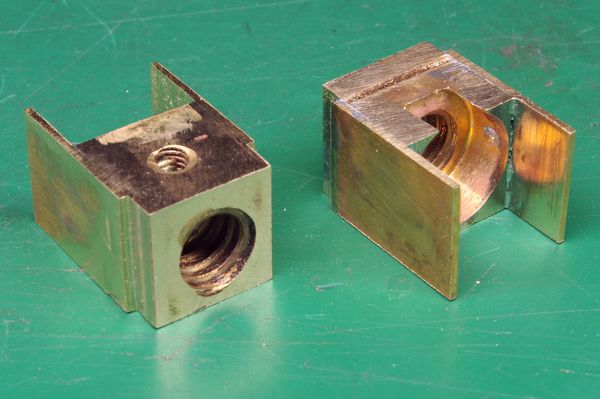
Click on the photo for a close-up view of the nuts.
Self-adjusting nuts
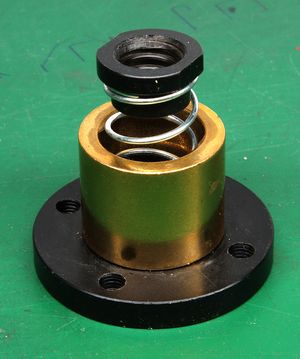
There are two-part nuts with a compression spring between them, which compensates for play. Of course, this system does not allow for large forces to be applied to the table, as these are limited by the force of the spring. Nevertheless, it is a suitable solution and much cheaper than ball screws, which would undoubtedly be difficult to adapt to the table.
Such nuts also pose significant adaptation difficulties, as the original nuts are small (15 mm cubes). Here is this type of nut.
The difficulty becomes clear when you realise that the brass body has a diameter of 22 mm and its bore is 16 mm!
Homemade adjustment nuts
I recently ordered replacement Proxxon nuts from the manufacturer itself, as the previous ones were worn out.
Then I had the idea of using the old nuts in combination with the new ones, based on the principle of a compression spring, as shown in the drawing shown here.
- Old nut.
- Spring ⌀ 13, L. 25, wire ⌀ 1.
- New nut.
- Countersink ⌀ 13.5 × P 6.
- Brass plate 15 × 20 × 1.
The two nuts are guided in parallel using brass plates soldered to the sides of the old nut.
A 6 mm deep countersink must be made in the old nuts to hold the compressed springs. I used the springs supplied with the above nuts, which required me to bore to ⌀ 14.5 mm. With the recommended springs, a ⌀ 13.5 bore will suffice, leaving a little more material on the edges.
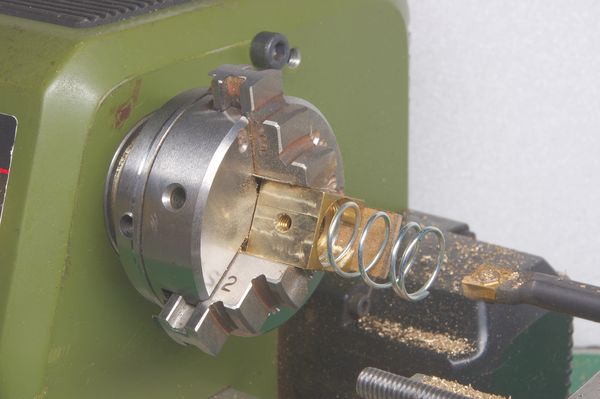
For this machining, I used my Proxxon lathe, which I find more and more applications for, with a boring tool small enough to penetrate the nut.
Machining the nuts
Please note: only two of the four nuts (the old ones, in my case) need to be machined.
The first step is to grind down the threaded fixing pin.
The second step is boring. The main difficulty is centring the cubic part in the three-jaw chuck. This is the kind of situation where a four-jaw chuck with separately adjustable jaws would really come into its own!
- Mounting the part: to centre it, I experimented until I found the right position, placing a 2.3 mm shim under the part on the opposite side to the thread and another 0.3 mm shim on the left. To determine the thickness of these shims, I carried out tests by moving the tailstock rotating tip close to the part without locking the tailstock to the bench. I chose the combination of shims that produced the least vibration on the tip…
- Mounting the tool: a 4 mm shim, not visible in the photo, is required to ensure it is at the correct height.
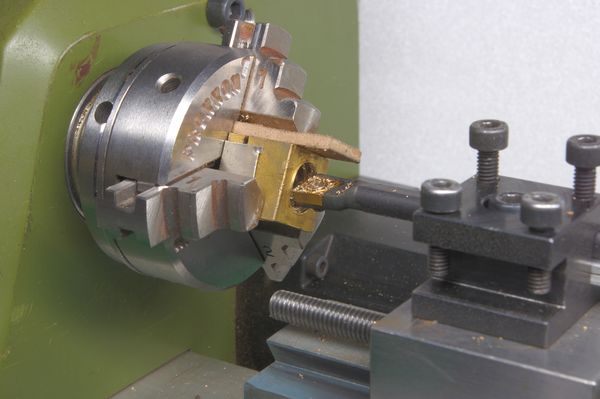
- Once the operation is complete, I check that the spring fits properly into the countersink. I was fortunate to achieve very satisfactory centring on both parts.
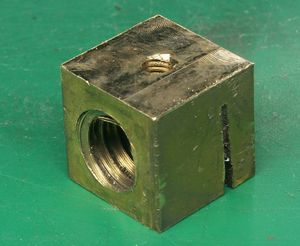
Here is a machined nut.
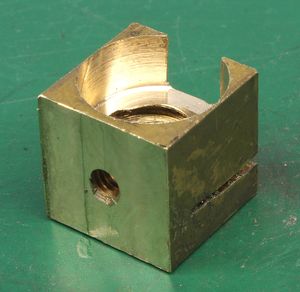
You can see the slot I made at the bottom right to try to eliminate the nut’s play.
Assembling the guide plates
The guide plates, made of 1 mm brass sheet metal, are soldered to the nuts with tin-silver solder.
Mounting on the worm screws
One question arises: on which side should the second nut be mounted? Its presence increases the overall dimensions and therefore reduces the table’s travel. For the Y axis, the answer is quite simple, as the table hits the support column, thus limiting the travel. Adding the second nut in front of the first (in the direction of increasing Y) will therefore not be a problem.
For the X axis, the spring nut will be placed on the crank side.
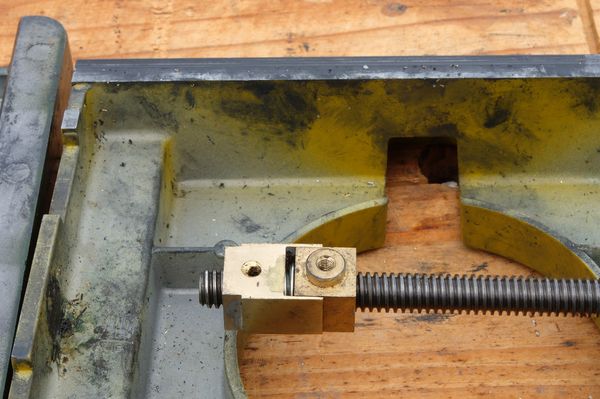
Click on the photo for a closer view.
Validation tests
Measurements on the X axis
The base of the comparator is mounted on the only magnetic part of the support, the column; the rest is made of aluminium… This forces me to do some contortions to position the comparator correctly.
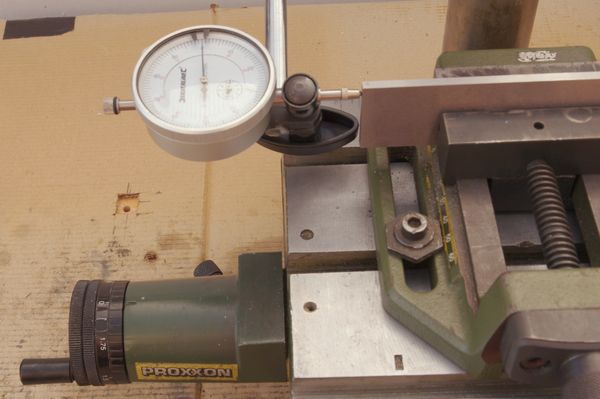
Checking the pitch
I move forward one turn (2 mm) to check the pitch. The comparator gives the actual advance, which, in five tests, varies between 1.94 and 2.00 mm, giving an average of 1.97 mm and an error of 0.15%.
Measuring the play
Once I have adjusted the zero on the vernier and the comparator, I move forward about one turn, then move back until zero is displayed again. The play on several tests is 0.02 mm.After adjusting the zero on the vernier and the comparator, I move forward about one turn, then back until the vernier displays zero again. The play over some tests is remarkably consistent and amounts to 20/100.
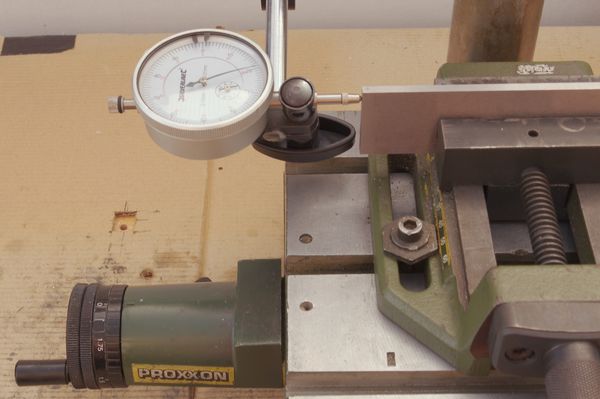
Click on the photo for a close-up view of the dial.
Measurements on the Y-axis
View of the device for the Y-axis.
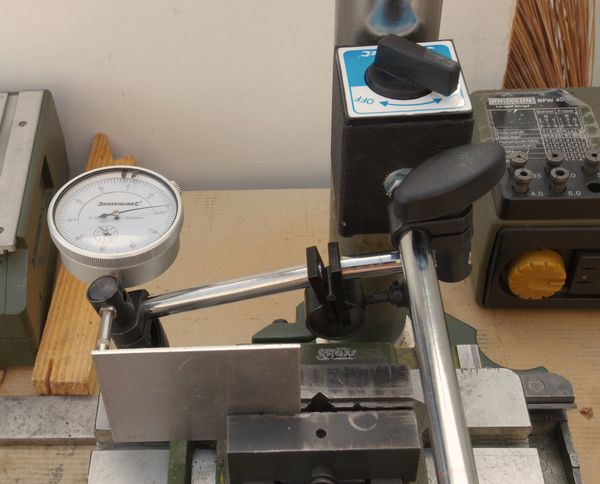
For a correct measurement, the comparator probe must be as parallel as possible to the axis of movement.
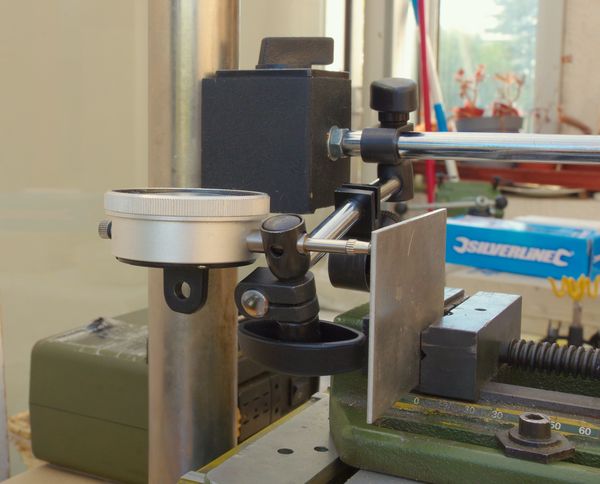
Checking the pitch
The average of three tests is 1.997 mm, or 2 mm with uncertainties.
Measurement of play
Same method as for the X-axis. Starting position:
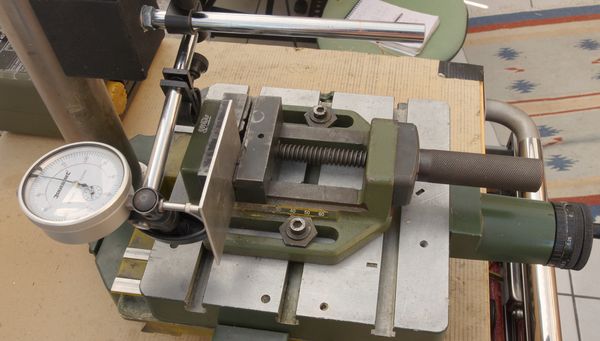
Return position:
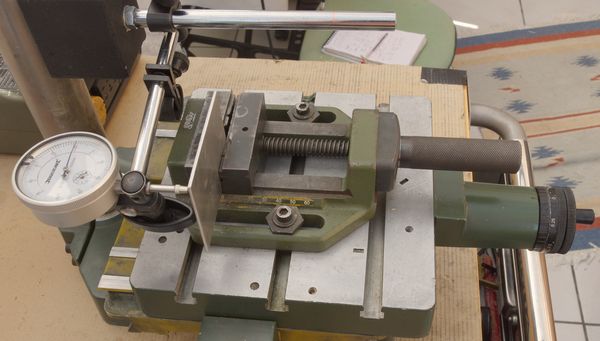
The play is the same as in X, i.e. 20/100.
Conclusion
I am not sure if I have improved the play compared to new nuts (I did not do this before modifying them for comparison). However, there is definitely an improvement compared to the old, worn nuts, which had a play ranging from 50/100 to 75/100 of a millimetre. I hope this improvement in play will last…
Proxxon KT 150 X-Y table
Reference 20150
Price 2025: €164,36
at reichelt elektronic.
Support for Proxxon drill
Reference 20000
Price 2025: €186,54
at reichelt elektronic.
Primus 75 vice
Reference 20392
Price 2025: €57,47
at reichelt elektronic.
BFW 40/E milling motor
Reference 20165
Price 2025: €187,05
at reichelt elektronic.
Ball stop ⌀ 10 × ⌀ 18 × e 5,5
Reference F10-18G
Price 2025: €7,44
at 123roulement.
Anti-backlash nut for trapezoidal worm screw
Pitch 2mm lead 10mm
Price 2025: €3,69
on aliexpress.
Replacement nut
Reference 20150-22
Price 2025: €6,90
order to this address.
Compression spring
⌀ out. 13, ⌀ wire, free length 25
Price 2025: €2,14
sur aliexpress.
Boring tool ⌀ 6 for lathe,
for ⌀ 8 min hole — shipped without insert!
Price 2025: €3,49
on aliexpress.